Configure Customers 2 profile summary
This article provides instructions for configuring the customer profile summary that appears near the top of an Customers Module details page for a Customers 2 implementation.
About this task
From this page, you can either edit the existing profile_info sub-component or create a new sub-component. The other sub-components are not editable.
Steps
-
On the Admin & Rights 2.0 dashboard, under Module Configurations, click Customers2 Settings. The Customers 2 Settings page opens, displaying the sub-components of the first component listed in the page's navigation panel.
- Click headers to see the associated sub-components - all of which constitute the customer profile summary.
- If you want to edit the profile content that appears in the existing profile_info sub-component, select it and then proceed to step 6.
- If you want to create a new headers sub-component, click Create New Component to open the Create New Component modal.
- In the Types field, select or enter "headers." In the Value field, specify a name for the new sub-component. Then click OK. The new component appears in the Available Components section of the page. Double-click the new component to have it appear at the bottom of the Selected Components table.
-
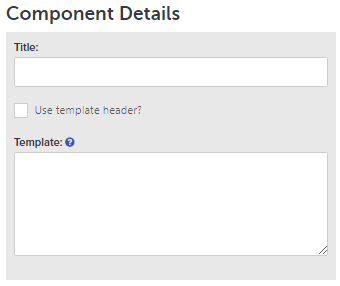
Now, for either profile_info or a new sub-component, define your content in the Component Details text box, which is shown below:

- In the Title field, specify a title for the sub-component. For example, "MEMBER."
- CIick Use template header? if you want to open the "Template header" text box and specify a header for the content that appears.
-
In the Template text box, enter the content - HTML or plain text - for the sub-component's body. For example:
<h3><%= user.first_name %> <%= user.last_name %></h3>
<b>Email:</b> <%= user.email %><br>
<b>External ID:</b> <%= user.external_id %><br>
<b>Date of birth:</b> <%= formatDate(user.dob) %><br>
<b>Language:</b> English<br>
<b>Account Status:</b> <%= cap(user.account_status) %>
If you need help on formatting HTML in the template, click the question mark and consult the Template Hints screen.
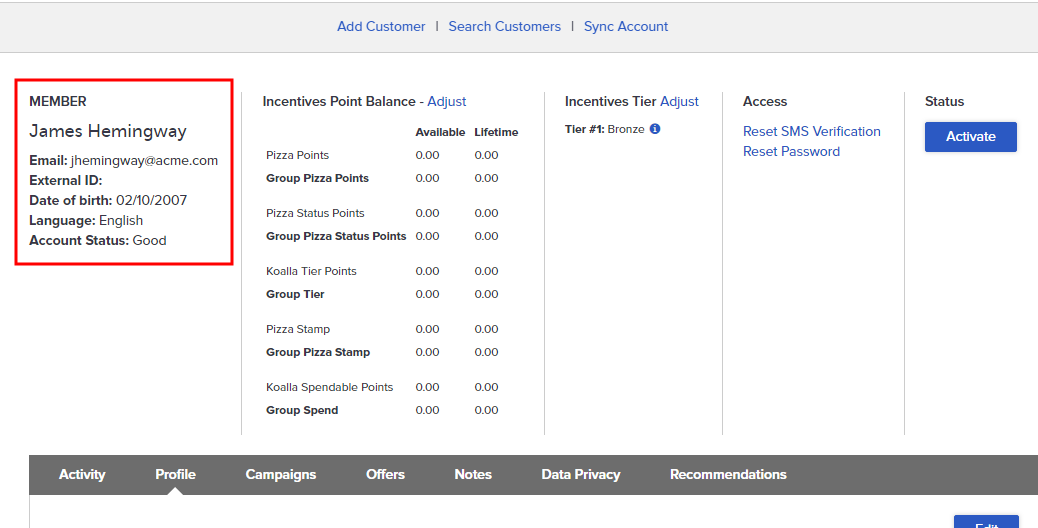
- Click Save. When you refresh the page, the new or revised sub-component displays on the Customers Module details page. For example, the rendered HTML shown in the red box below:
